
Backfloat for Beginners

Backfloat for Beginners – Step-by-Step Guide, Benefits & FAQs
Learning how to backfloat is one of the most important beginner swimming skills. Before freestyle, breaststroke, or survival strokes, every swimmer must first learn how to relax and float confidently on their back. It is one of the most important survival skills everyone must know.
Backfloating builds water confidence, breath control, safety awareness, and survival readiness. For beginners — especially children and nervous adults — mastering this simple skill can be life-changing.
In this complete guide, you will learn:
- ✅ What is backfloat
- ✅ Step-by-step sequence for beginners
- ✅ Common mistakes and corrections
- ✅ Benefits of backfloating in swimming
- ✅ Frequently Asked Questions
What Is a Backfloat?
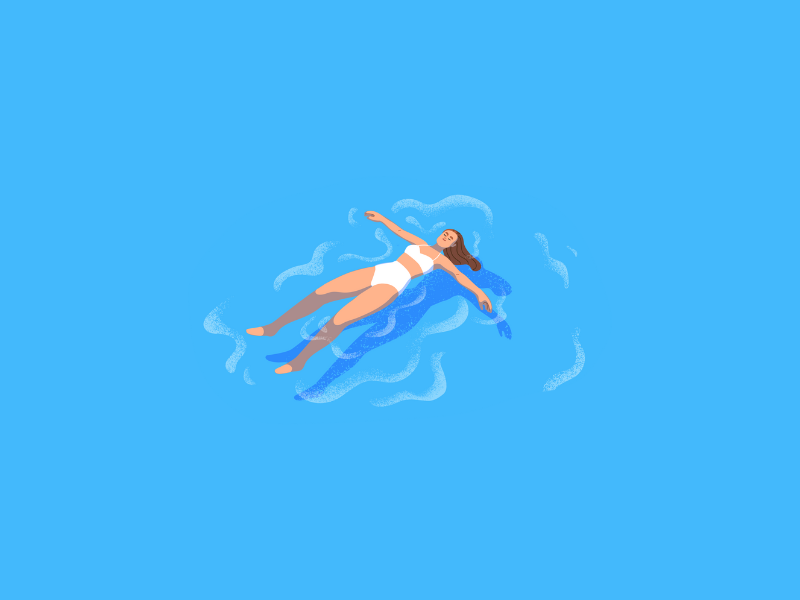
A backfloat is when a swimmer lies flat on their back in the water, with the face above the surface, arms and legs gently spread, allowing the body to float naturally.
It is often called the “Starfish Float” because the body position looks like a star shape.
Backfloating is a foundational survival skill taught in structured programs worldwide and strongly emphasized in water safety training.
Why Backfloat Is Important for Beginners
Many beginners panic in water because they feel they must constantly move to stay afloat. Backfloating teaches:
- The body naturally floats when relaxed
- Breathing is easy when face is up
- You can rest in deep water
- Calmness prevents sinking
For coaches and swim schools, backfloat is usually introduced early because it builds trust between the swimmer and water.
Step-by-Step Sequence: How to Do Backfloat for Beginners
Step 1: Start in Shallow Water

Begin in waist-deep water. Stand comfortably with:
- Feet shoulder-width apart
- Knees slightly bent
- Eyes looking forward
- Take a slow deep breath
💡 Tip: The more air in your lungs, the easier you float.
Step 2: Lean Back Slowly
Gently lean your head back first.
- Ears go into the water
- Chin slightly up
- Eyes looking at the ceiling or sky
Important cue:
👉 “Water supports your head like a pillow.”
Many beginners lift their head too high. This causes hips to sink.
Step 3: Spread Arms and Legs (Starfish Position)
Once leaning back:
- Open arms sideways
- Open legs slightly apart
- Relax shoulders
- Keep stomach gently lifted
Think:
⭐ “Big star shape.”
The wider your body spreads, the more stable your float becomes.
Step 4: Relax and Breathe Normally
This is the MOST important step.
- Slow breathing
- No stiff muscles
- Let hips rise naturally
- Keep belly button near surface
If nervous:
Take small sculling motions with hands until comfortable.
Step 5: Maintain Balance
To stay balanced:
- Keep chin slightly up
- Press ears into water
- Engage light core tension
- Avoid sudden movements
Practice floating for 5–10 seconds first.
Then progress to 20–30 seconds.
Common Beginner Mistakes (And How to Fix Them)
| Mistake | Why It Happens | Correction |
|---|---|---|
| Head lifted forward | Fear of water | Tell swimmer to “look at the sky” |
| Body stiff | Anxiety | Practice relaxation breathing |
| Hips sinking | Weak core engagement | Lift tummy slightly |
| Arms too close | Narrow base | Spread wider |
| Fast breathing | Panic | Count 1–2 inhale, 1–2 exhale |
Backfloat is more about relaxation than strength.
Benefits of Backfloat in Swimming
Backfloat is not just a beginner drill. It provides long-term advantages.
1. Builds Water Confidence
Once a swimmer realizes they can float without effort, fear reduces dramatically. Confidence increases rapidly.
2. Essential Survival Skill
In deep water, backfloating allows you to:
- Rest
- Call for help
- Recover from choking
- Conserve energy
It is one of the most effective drowning prevention techniques.
3. Improves Body Position Awareness
Backfloating teaches:
- Neutral spine alignment
- Hip positioning
- Core engagement
- Balance control
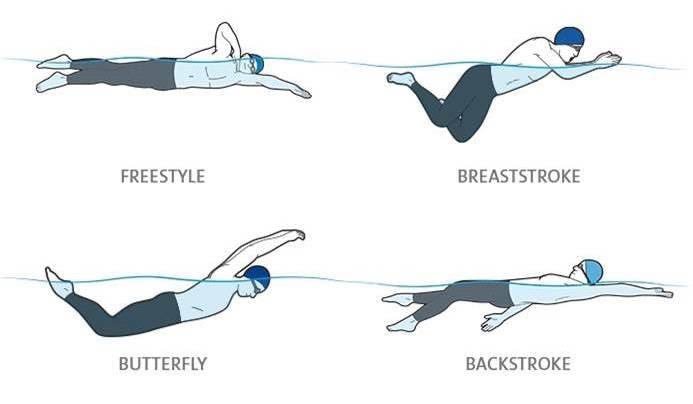
These fundamentals improve all strokes including freestyle and backstroke.
4. Enhances Breathing Control
Since the face stays above water:
- Breathing becomes calm
- Rhythm improves
- Anxiety reduces
Beginners learn to separate breathing from panic.
5. Develops Relaxation in Water
Tension causes sinking.
Relaxation creates buoyancy.
Backfloat teaches swimmers to trust water support.
6. Foundation for Backstroke
Backstroke starts from confident backfloating. Without float stability, stroke technique collapses.
Progression Drills for Backfloat
After mastering basic float, try:
✅ Starfish to Pencil
Float wide → bring arms close → return wide.
✅ Backfloat to Stand
Float 5 seconds → tuck chin → push knees → stand up.
✅ Backfloat with Gentle Kick
Add small flutter kicks while floating.
These drills improve independence and control.
Teaching Tips for Coaches & Parents
- Always support head gently during first attempts
- Use positive reinforcement
- Avoid forcing submersion
- Practice near wall for safety
- Keep sessions short and encouraging
For children especially, turning it into a “Starfish Game” increases engagement.
Safety Reminders
- Always supervise beginners
- Never practice alone
- Avoid overcrowded pools
- Progress gradually
Backfloat builds safety — but supervision remains essential.
Frequently Asked Questions (FAQ)
1. Why do my legs sink during backfloat?
Leg sinking usually happens because:
Head is lifted
Core is not engaged
Body is stiff
Solution: Relax, look upward, gently tighten tummy.
2. Is backfloating harder for adults?
Adults often struggle more because:
Higher muscle tension
Fear of losing control
But adults actually float well once relaxed.
3. How long should a beginner practice backfloat?
Start with 5–10 seconds.
Gradually build up to 30–60 seconds.
Consistency is more important than duration.
4. Can overweight people float more easily?
Body fat increases buoyancy. However, floating ability depends more on relaxation and technique than weight alone.
5. Should I hold my breath when backfloating?
No. Breathe normally and calmly. Holding breath increases tension.
6. What if water enters my ears?
This is normal. Just relaxed in the water. Water enter in the ear is common among people doing backfloating.
7. Is backfloat useful in open water?
Yes.. In open water, backfloat helps conserve energy and stay visible while waiting for assistance.
8. At what age can children learn backfloat?
As soon as water introduction begin. The earlier they learn, the better.
9. How is backfloat different from deadman float?
Backfloat = face up, Deadman float = face down
Backfloat is safer as it allows your mouth to catch in air when you face up.
10. How do I overcome fear while backfloating?
Start in shallow water
Use instructor support
Practice controlled breathing
Build gradually
Fear reduces with repetition and positive experience.
When you are doing backfloat for the first time, it is advisable to do in the shallow water and be prepared of the unforesee danger such as water getting into your nose. It is quite painful if water enter into your nose. Blow out from the nose if the water enter the nose.
Backfloat Summary
Backfloating is one of the most powerful beginner swimming skills.
It builds:
- Confidence
- Safety
- Relaxation
- Breath control
- Body alignment
Before strokes, before speed, before competition — comes float.
If every swimmer masters backfloat early, drowning risks decrease significantly and stroke development becomes smoother.
So whether you’re teaching children, coaching adults, or learning yourself — never underestimate the power of the simple backfloat.
⭐ Float first. Swim better. Stay safer.